You can create NACHA files in ACH Pro using your QuickBooks Online transactions, invoices and bills. This guide will walk you through connecting your QuickBooks Online account to ACH Pro.
NOTE: This guide is for QuickBooks Online. If you are using QuickBooks Desktop, see our guide for installing QuickBooks Desktop.
Prerequisites
A QuickBooks Online account
An ACH Pro account. Everything discussed here is available in our free Starter plan.
A basic understanding of how ACH transfers work and the information required to create a transaction
Walkthrough: Create NACHA file using QuickBooks Online Transactions
You can easily convert your QuickBooks Online transactions to NACHA format using ACH Pro. The steps below will guide you through the process of connecting QuickBooks Online to ACH Pro account, syncing existing data and creating NACHA files using QuickBooks transactions.
1. Connect QuickBooks to ACH Pro
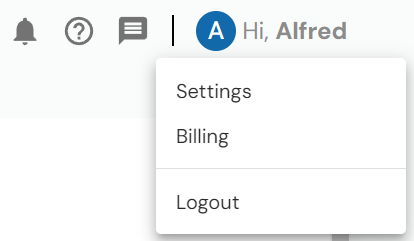
If you don't yet have an ACH Pro account, you can create a free one here. To get started, log in to ACH Pro and click your name in the top right corner. In the menu that appears, click Settings.
On the Account Settings page, scroll down to the Apps section and click Connect for QuickBooks Online. This will redirect you to a QuickBooks login page.

Log in to QuickBooks Online

Next you will be asked to give ACH Pro access to your QuickBooks data. Click Connect to authorize access to your data and be redirected to ACH Pro.

2. Sync QuickBooks recipients
After connecting, you will be presented with a page in ACH Pro that allows you to manage you QuickBooks Online connection.
A few things to note:
You can sync data into ACH Pro at any time using the Sync button. We will keep the selected types in sync automatically, but you can always manually sync if needed.
Selecting types to sync and then clicking Save will remember your selection for next time.
If you ever need to disconnect your QuickBooks account from ACH Pro, you can do so by clicking Disconnect at the bottom of the page.
You can open these settings in the future by clicking Manage on the QuickBooks Online app on the ACH Pro settings page.

If you click Sync, you will receive notifications in ACH Pro for every new recipient, company and account created using QuickBooks data.

Recipients synced from QuickBooks will need account information added before they can be used in an ACH file. You could do this by clicking the notification and adding accounts to the recipient, or as we'll do later, create the accounts while you are configuring the ACH file.
3. Create an ACH File using QuickBooks Online Transactions
Now that you've synced in your existing customers, employees and vendors from QuickBooks Online, ACH Pro can link them automatically to transactions that will be used in ACH files.
To create an ACH file using your QuickBooks transactions, click Create File in the left menu of ACH Pro and then click From QuickBooks.

You can search transactions in QuickBooks by date and type.
Types:
Posted Transactions: All transactions, searched by date created.
Unpaid Invoices: Invoices with an outstanding balance, searched by due date.
Unpaid Bills: Bills with an outstanding balance, searched by due date.

A list of QuickBooks transactions will be displayed matching your search.
A few notes:
We will prefill the ACH Entry Type for each transaction. If you need to change this, make a new selection in the ACH Entry Type dropdown for the transaction. Debits pull money from the recipient's account, credits push money to the recipient's account.
We will also prefill Recipient information for the transaction. If the recipient on the transaction matched an existing recipient in ACH Pro, we will link it. If the recipient isn't found, we will populate the name and you will add more details on the next screen.
Select one or more transactions to include in the ACH file by clicking the checkbox for each applicable row. The bottom left corner of the list displays the number of selected records.
Click Pay when you're ready to create the ACH file.

After you click Pay, complete all the required fields in the ACH file builder:
Name: Name of file for your records
ODFI: The bank you will upload this NACHA file to
Sending Company: This is the company originating the transactions, typically this will be the synced QuickBooks company.
Effective Date: The date the transactions should post to the recipients' bank accounts.
Entry Description: A short, meaningful description for the recipients.
SEC Code: PPD for consumers or debits, CCD for credits to businesses.
Account details: Each transactions will need complete account details.

We need to add account details for our customer Mark Cho. If he had existing accounts, they would be listed in the dropdown. Clicking New Account will open a window where you can enter account details.

When you've completed all the required fields, click Create File in the bottom right corner.
4. Download NACHA File
You can now download the NACHA file. You can also optionally download a PDF report summarizing the file or a NACHA prenote file (all amounts zero).

After closing this page, you can download previous NACHA files or reports on the History page.
Wrap Up
You've successfully created a NACHA file in ACH Pro using transactions from QuickBooks Online. ACH Pro offers a variety of other features as well:
Recipient, company and ODFI management
ACH templates
Automatic SFTP upload of NACHA files to your bank
Full suite of APIs
Comments